REF: MEN-2026-0010
Endocrinology
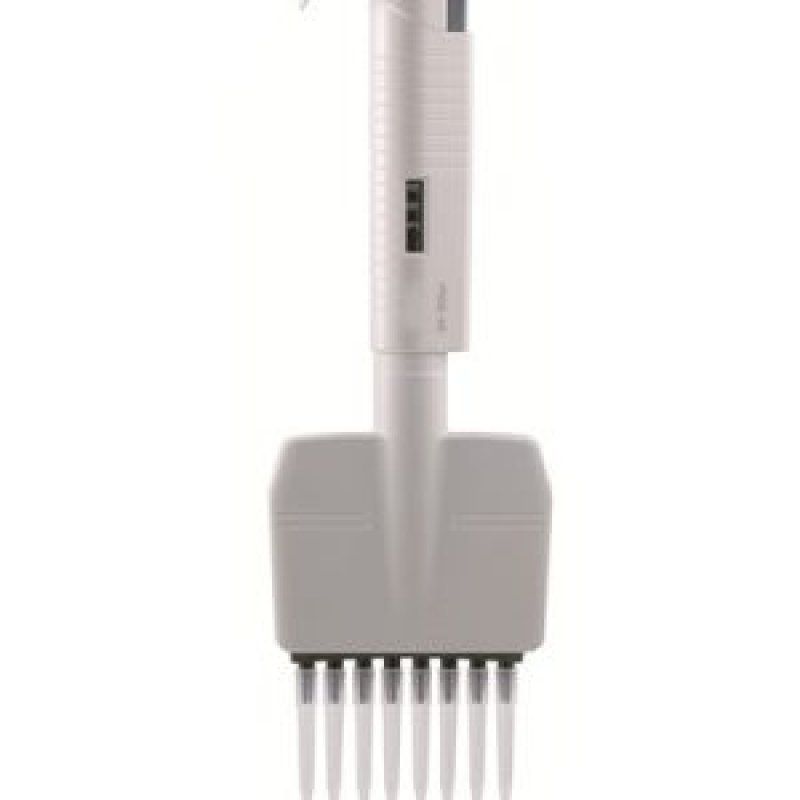
8 Channel Adjustable Volume Pipe.
Sold & Shipped By
Official Store
Price on Request
Product Code MEN-2026-0010
Condition New
Availability On Request
Warranty
Sub-Category Pipettes / 8 Channel Adjustable Volume Pipe.
Pipettes cover a volume range from 0.1 μL to 10 mL.
Ergonomic design provides an excellent operating experience.
A large display window allows for easy volume identification.
Easy calibration and maintenance.
The dispensing head rotates for effortless pipetting convenience.
Individual piston and tip cone assemblies allow easy repair and maintenance.
A compound material-made tip cone secures high sealing performance.
Compatible with most universal tip brands.
Online calibration is available.
Ergonomic design provides an excellent operating experience.
A large display window allows for easy volume identification.
Easy calibration and maintenance.
The dispensing head rotates for effortless pipetting convenience.
Individual piston and tip cone assemblies allow easy repair and maintenance.
A compound material-made tip cone secures high sealing performance.
Compatible with most universal tip brands.
Online calibration is available.
Please contact our technical team for full specifications.
1. Set the Volume
Adjust the Dial: Rotate the volume adjustment dial (often on the top plunger or a side wheel) until the desired volume is displayed in the window.
Observe Range Limits: Do not turn the dial past the maximum or minimum volume capacity of the pipette to avoid damaging the mechanism.
Lock (If Applicable): Some models require you to push down or lock the dial after setting the volume.
2. Attach the Tips
Select Proper Tips: Use 8 high-quality, matching, and sterile tips.
Attach Evenly: Press the pipette shaft directly down into the rack of tips with consistent, firm, vertical pressure to ensure all 8 tips are attached securely and are at the same height.
3. Pre-wet the Tips (Crucial for Accuracy)
Pre-wetting: Before aspirating your actual sample, aspirate and dispense water or reagent 2-3 times. This ensures consistent temperature and humidity within the tip, significantly improving accuracy, especially with viscous or volatile liquids.
4. Aspirate (Draw Up) the Sample
First Stop: Press the plunger down to the first stop.
Submerge: Keep the pipette vertical and submerge all 8 tips 2-3 mm below the surface of the liquid in the reagent reservoir.
Release Slowly: Gradually release the plunger, ensuring the tips remain submerged, to avoid drawing up air bubbles.
Wait: Pause for 1-2 seconds to ensure all channels have finished drawing liquid.
Check Levels: Visually check that all 8 tips have an equal level of liquid.
5. Dispense the Sample
Angle: Place the tips against the side wall of the target well or tube at a slight angle.
Dispense: Smoothly press the plunger down to the first stop.
Blowout: After a short pause, press the plunger to the second stop (the bottom-most, hard stop) to expel any remaining liquid.
Remove: Withdraw the pipette vertically from the wells while still holding down the plunger to prevent pulling liquid back up.
6. Eject Tips
Eject: Press the tip ejector button to dispose of the tips into a waste container.
Important Tips for Success
Verticality: Always keep the pipette as vertical as possible when aspirating and dispensing.
Consistency: Use a consistent, even pressure when loading tips and pushing the plunger.
Handling Bubbles: If bubbles appear, gently shake or "tap" the tips, or pipette up and down to remove them.
Maintenance: Regularly check for leaks, clean, and calibrate your pipette according to the manufacturer’s instructions.
Adjust the Dial: Rotate the volume adjustment dial (often on the top plunger or a side wheel) until the desired volume is displayed in the window.
Observe Range Limits: Do not turn the dial past the maximum or minimum volume capacity of the pipette to avoid damaging the mechanism.
Lock (If Applicable): Some models require you to push down or lock the dial after setting the volume.
2. Attach the Tips
Select Proper Tips: Use 8 high-quality, matching, and sterile tips.
Attach Evenly: Press the pipette shaft directly down into the rack of tips with consistent, firm, vertical pressure to ensure all 8 tips are attached securely and are at the same height.
3. Pre-wet the Tips (Crucial for Accuracy)
Pre-wetting: Before aspirating your actual sample, aspirate and dispense water or reagent 2-3 times. This ensures consistent temperature and humidity within the tip, significantly improving accuracy, especially with viscous or volatile liquids.
4. Aspirate (Draw Up) the Sample
First Stop: Press the plunger down to the first stop.
Submerge: Keep the pipette vertical and submerge all 8 tips 2-3 mm below the surface of the liquid in the reagent reservoir.
Release Slowly: Gradually release the plunger, ensuring the tips remain submerged, to avoid drawing up air bubbles.
Wait: Pause for 1-2 seconds to ensure all channels have finished drawing liquid.
Check Levels: Visually check that all 8 tips have an equal level of liquid.
5. Dispense the Sample
Angle: Place the tips against the side wall of the target well or tube at a slight angle.
Dispense: Smoothly press the plunger down to the first stop.
Blowout: After a short pause, press the plunger to the second stop (the bottom-most, hard stop) to expel any remaining liquid.
Remove: Withdraw the pipette vertically from the wells while still holding down the plunger to prevent pulling liquid back up.
6. Eject Tips
Eject: Press the tip ejector button to dispose of the tips into a waste container.
Important Tips for Success
Verticality: Always keep the pipette as vertical as possible when aspirating and dispensing.
Consistency: Use a consistent, even pressure when loading tips and pushing the plunger.
Handling Bubbles: If bubbles appear, gently shake or "tap" the tips, or pipette up and down to remove them.
Maintenance: Regularly check for leaks, clean, and calibrate your pipette according to the manufacturer’s instructions.