REF: MEN-2026-0052
Radiology
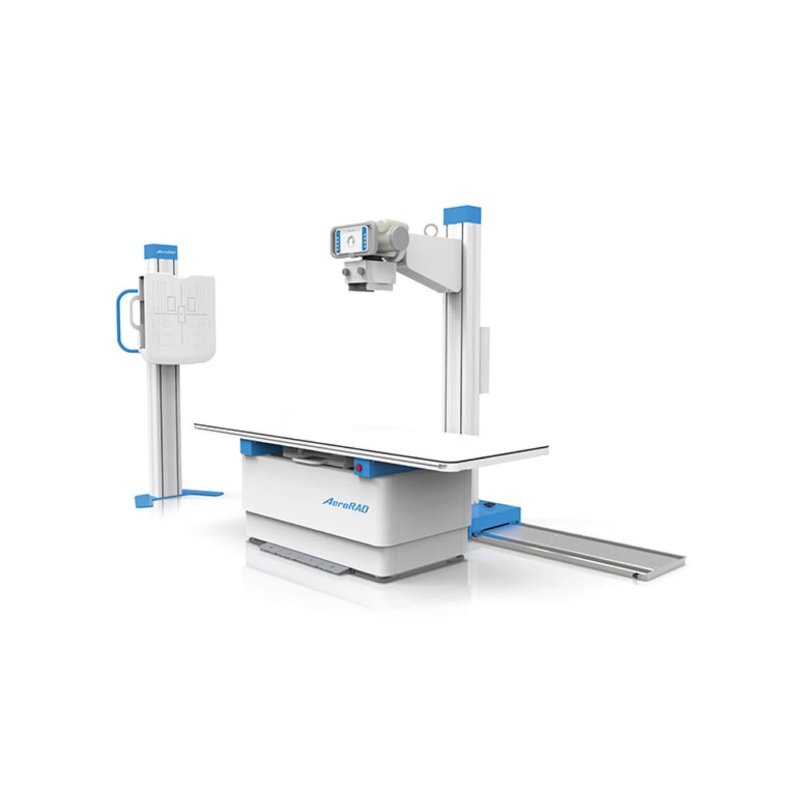
Digital X-ray Machine (Static)
Sold & Shipped By
Official Store
Price on Request
Product Code MEN-2026-0052
Condition New
Availability In Stock
Warranty
Sub-Category Scanning Device
Powerful Imaging Capability: These machines feature a high-frequency generator (typically 32kW to 50kW) providing a 400mA current, which allows for fast, high-contrast, and precise imaging.
High Voltage Range: The system operates with a wide voltage range, generally between 40kV and 125kV, allowing for flexibility in imaging different body densities.
Dual Focus X-ray Tube: Equipped with a rotating anode X-ray tube featuring dual focus (e.g., 0.6mm/1.2mm or 1.0mm/2.0mm) for improved image resolution.
Advanced Imaging System (DR): Many modern 400mA static units are Digital Radiography (DR) ready or equipped, featuring a 17" x 17" wireless or wired flat panel detector (FPD) using Cesium Iodide (CsI) technology, delivering high-resolution images (e.g., 3072 x 3072 pixels).
Versatile Radiography Table: Includes a multi-function, often floating, radiographic table that allows for easy positioning (longitudinal and transversal movement), sometimes with electromagnetic braking for stable, precise, and user-friendly operation.
Safety and Protection: These machines are designed for safety, featuring X-ray tube heat storage capacity protection, anode start-up protection, and radiograph time-limit protection to ensure long-term, reliable operation.
User-Friendly Interface & Software: Systems are operated via LCD touch-screen consoles, often with, or supporting, anatomical program (APR) settings for different body parts and automatic exposure control (AEC).
Compact & Durable Design: Designed for stationary use in clinics, these systems are built with durable materials, with some models offering 360-degree rotation capabilities.
DICOM Compatibility: Integrated, user-friendly software that supports DICOM 3.0 standards for seamless networking, including work-list management, printing, and storage in Picture Archiving and Communication Systems (PACS).
High Voltage Range: The system operates with a wide voltage range, generally between 40kV and 125kV, allowing for flexibility in imaging different body densities.
Dual Focus X-ray Tube: Equipped with a rotating anode X-ray tube featuring dual focus (e.g., 0.6mm/1.2mm or 1.0mm/2.0mm) for improved image resolution.
Advanced Imaging System (DR): Many modern 400mA static units are Digital Radiography (DR) ready or equipped, featuring a 17" x 17" wireless or wired flat panel detector (FPD) using Cesium Iodide (CsI) technology, delivering high-resolution images (e.g., 3072 x 3072 pixels).
Versatile Radiography Table: Includes a multi-function, often floating, radiographic table that allows for easy positioning (longitudinal and transversal movement), sometimes with electromagnetic braking for stable, precise, and user-friendly operation.
Safety and Protection: These machines are designed for safety, featuring X-ray tube heat storage capacity protection, anode start-up protection, and radiograph time-limit protection to ensure long-term, reliable operation.
User-Friendly Interface & Software: Systems are operated via LCD touch-screen consoles, often with, or supporting, anatomical program (APR) settings for different body parts and automatic exposure control (AEC).
Compact & Durable Design: Designed for stationary use in clinics, these systems are built with durable materials, with some models offering 360-degree rotation capabilities.
DICOM Compatibility: Integrated, user-friendly software that supports DICOM 3.0 standards for seamless networking, including work-list management, printing, and storage in Picture Archiving and Communication Systems (PACS).
Please contact our technical team for full specifications.
safety First: The operator must work from a designated, radiation-shielded area (lead-lined control booth) to minimize radiation exposure.
Startup: Turn on the main X-ray machine and the associated workstation/computer system.
Check Indicators: Ensure the system is ready for operation and that there are no error codes or over-hot alarms (check the anode temperature if necessary).
Position the Patient: Place the patient on the radiographic table or against the Bucky stand (chest stand) depending on the body part being imaged.
Adjust Equipment: Move the tube and detector into the correct alignment (usually a U-arm or ceiling-mounted tube/table combo).
Collimation: Adjust the collimator on the X-ray tube to align the beam size with the detector/cassette size, ensuring only the necessary area is exposed.
Set kVp (Kilovoltage Peak): Adjust the penetrating power based on the body part (e.g., lower for extremities, higher for chest/abdomen).
Set mA (Milliamperage): Set the current. At 400mA, this indicates the tube's capacity to produce a high volume of photons quickly.
Set Time (s) or mAs: Select the exposure time. Many modern systems use automatic exposure control (AEC) or pre-programmed techniques to set this automatically.
Common Ranges: Typical studies use 60–120 kVp, with the 400mA capacity allowing for short exposure times.
Final Verification: Ensure the patient is holding still and that you are in the protected area.
Prepare/Ready Switch: Press the exposure button to the first stage to warm up the tube.
Activate Exposure: Press the button fully to take the exposure. Maintain pressure until the audible/visible signal stops.
Image Acquisition: The digital image will appear on the monitor immediately for review.
Startup: Turn on the main X-ray machine and the associated workstation/computer system.
Check Indicators: Ensure the system is ready for operation and that there are no error codes or over-hot alarms (check the anode temperature if necessary).
Position the Patient: Place the patient on the radiographic table or against the Bucky stand (chest stand) depending on the body part being imaged.
Adjust Equipment: Move the tube and detector into the correct alignment (usually a U-arm or ceiling-mounted tube/table combo).
Collimation: Adjust the collimator on the X-ray tube to align the beam size with the detector/cassette size, ensuring only the necessary area is exposed.
Set kVp (Kilovoltage Peak): Adjust the penetrating power based on the body part (e.g., lower for extremities, higher for chest/abdomen).
Set mA (Milliamperage): Set the current. At 400mA, this indicates the tube's capacity to produce a high volume of photons quickly.
Set Time (s) or mAs: Select the exposure time. Many modern systems use automatic exposure control (AEC) or pre-programmed techniques to set this automatically.
Common Ranges: Typical studies use 60–120 kVp, with the 400mA capacity allowing for short exposure times.
Final Verification: Ensure the patient is holding still and that you are in the protected area.
Prepare/Ready Switch: Press the exposure button to the first stage to warm up the tube.
Activate Exposure: Press the button fully to take the exposure. Maintain pressure until the audible/visible signal stops.
Image Acquisition: The digital image will appear on the monitor immediately for review.