REF: MEN-2026-0108
Surgery
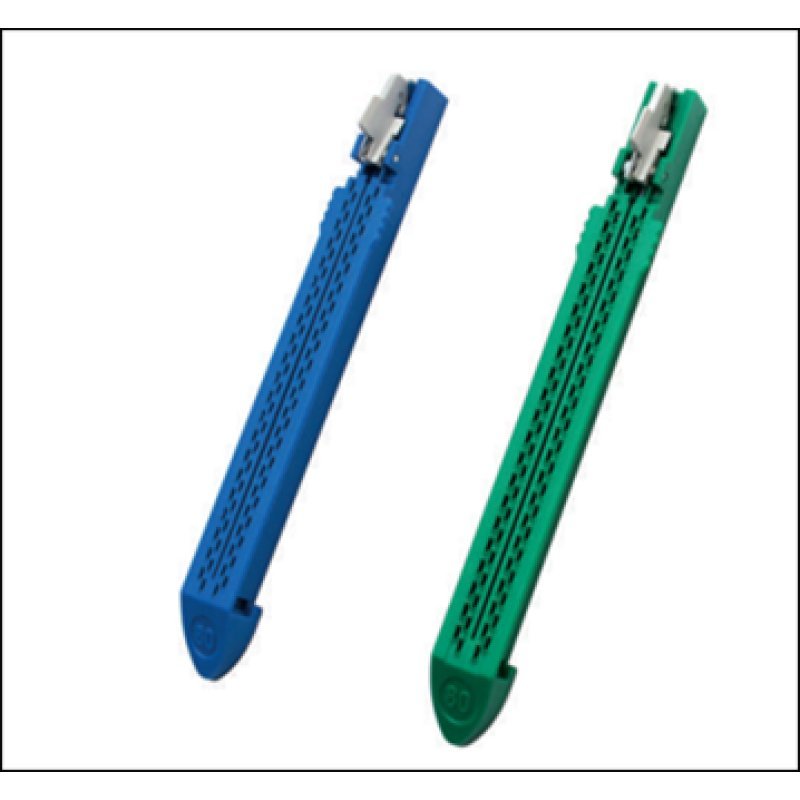
Linear Cutter Catridges
Sold & Shipped By
Official Store
₦28,000.00
Product Code MEN-2026-0108
Condition New
Availability In Stock
Warranty
Sub-Category
Water-droplet Groove Design: Increases the contact area by 30% to ensure reliable "B-shaped" staple formation.
CAM Mechanism: Provides consistent staple formation from the proximal to distal ends.
Gecko-Claw Surface Design: Ensures staples enter the grooves accurately during clamping and firing, reducing horizontal/longitudinal swing.
Safety Lock-out: Prevents the accidental firing of empty or used cartridges.
Tissue-Sparing Design: Minimizes unintended movement and tissue pulling during firing.
High-Strength Materials: Uses titanium staples to provide secure, consistent holding strength across variable tissue thicknesses.
Replaceable Cartridges: Allows for different staple heights to be used in a single, versatile stapler.
Curved Tip Anvil (Endo): Provides enhanced visibility and maneuverability around target tissues and vessels.
Integrated Cutting Blade: Ensures a fresh, sharp blade with each reload for a clean incision.
Convenient Handling: Features a middle locking setting for easier tissue positioning.
CAM Mechanism: Provides consistent staple formation from the proximal to distal ends.
Gecko-Claw Surface Design: Ensures staples enter the grooves accurately during clamping and firing, reducing horizontal/longitudinal swing.
Safety Lock-out: Prevents the accidental firing of empty or used cartridges.
Tissue-Sparing Design: Minimizes unintended movement and tissue pulling during firing.
High-Strength Materials: Uses titanium staples to provide secure, consistent holding strength across variable tissue thicknesses.
Replaceable Cartridges: Allows for different staple heights to be used in a single, versatile stapler.
Curved Tip Anvil (Endo): Provides enhanced visibility and maneuverability around target tissues and vessels.
Integrated Cutting Blade: Ensures a fresh, sharp blade with each reload for a clean incision.
Convenient Handling: Features a middle locking setting for easier tissue positioning.
Please contact our technical team for full specifications.
1. Preparation and Inspection
Check Integrity: Before opening, check the sterile packaging for damage, ensure it is within the expiry date, and verify that the cartridge size (staple height) matches the required tissue thickness.
Ensure Proper State: Ensure the linear cutter instrument is in the open position and the safety pin is fully retracted.
2. Inserting the Cartridge
Remove Old Cartridge: If a used cartridge is in the instrument, remove it by pulling the corrugated finger pad at the end of the cartridge.
Insert New Cartridge: Insert the tip of the new cartridge into the proximal end of the cartridge fork (the instrument jaw) and press it in firmly until a "click" is heard.
Remove Safety Cover: Remove the staple retaining cap/cover from the cartridge.
3. Positioning and Clamping
Place Tissue: Place the target tissue between the anvil and the cartridge jaws.
Close the Device: Squeeze the handles to close the device on the tissue. An audible click indicates complete closure.
Intermediate Positioning: The device may have a middle lock setting that allows for adjustment of the tissue position before final clamping.
4. Firing and Cutting
Check Position: Ensure the stapler is correctly positioned on the tissue.
Fire the Instrument: Continuously squeeze the firing handle until it reaches the end of the housing and stops.
Wait: It is recommended to wait approximately 15 seconds after firing to allow for tissue compression and coagulation.
Return the Firing Handle: Move the firing knob back to its original position.
Open and Remove: Press the release button to open the jaws and remove the instrument from the tissue.
5. Reloading
The device is equipped with a safety lock-out mechanism that prevents the reuse of a fired cartridge.
To replace with a new cartridge, repeat the steps in section 2.
Check Integrity: Before opening, check the sterile packaging for damage, ensure it is within the expiry date, and verify that the cartridge size (staple height) matches the required tissue thickness.
Ensure Proper State: Ensure the linear cutter instrument is in the open position and the safety pin is fully retracted.
2. Inserting the Cartridge
Remove Old Cartridge: If a used cartridge is in the instrument, remove it by pulling the corrugated finger pad at the end of the cartridge.
Insert New Cartridge: Insert the tip of the new cartridge into the proximal end of the cartridge fork (the instrument jaw) and press it in firmly until a "click" is heard.
Remove Safety Cover: Remove the staple retaining cap/cover from the cartridge.
3. Positioning and Clamping
Place Tissue: Place the target tissue between the anvil and the cartridge jaws.
Close the Device: Squeeze the handles to close the device on the tissue. An audible click indicates complete closure.
Intermediate Positioning: The device may have a middle lock setting that allows for adjustment of the tissue position before final clamping.
4. Firing and Cutting
Check Position: Ensure the stapler is correctly positioned on the tissue.
Fire the Instrument: Continuously squeeze the firing handle until it reaches the end of the housing and stops.
Wait: It is recommended to wait approximately 15 seconds after firing to allow for tissue compression and coagulation.
Return the Firing Handle: Move the firing knob back to its original position.
Open and Remove: Press the release button to open the jaws and remove the instrument from the tissue.
5. Reloading
The device is equipped with a safety lock-out mechanism that prevents the reuse of a fired cartridge.
To replace with a new cartridge, repeat the steps in section 2.
.jpeg)